Anyone who knows me know that I am slightly makeup obsessed. Trying new products, new looks, and watching endless hours of YouTube tutorials and hauls is a good time in my books. Only one problem, makeup is heavy and I have a lot of it. There’s no reason to leave all but the necessities at home like I did last year. Besides, why have it if you can’t use it, right? Let me walk you through my organizational process, step-by-step from disaster to flight ready.
Step 1: I quickly realized that I needed an intervention which started with a cease fire; I stopped buying anything that wasn’t a replacement for a truly empty staple about 3-6 months ago.
Step 2: I first started the purge by throwing out any products that were close to expiring, old or nearly empty (but not something I used often). This was pretty easy to do since there was a “line in the sand” so to speak. It didn’t matter if it was an old favorite of mine, I don’t have room for a product that is going bad or that’s 90% empty.
Step 3: This step was a little more difficult. I went through and pulled all the products that I ‘m not currently using, and from there, I decided wether or not I was going to use them in comparison to the products that I absolutely knew I was taking. For example, I have been using a brow powder in favor of my Anastasia Brow Pomade lately. It’s much faster and I’ve been pretty lazy with my makeup lately so I decided that I wouldn’t be taking the heavy glass pot of product. On the other hand, there were a few smaller eyeshadow pallets that I haven’t been using lately that I know I will once I go back to school, so I put those back in my collection.
Step 4: After deciding which products made the cut to go back into the bag, I separated the remaining products into four piles.
- Try and use up before I leave
- Products suitable to give away
- Products unsuitable to give away
- Costume makeup
I put my “products suitable to give away” pile immediately in a bag and put it away to keep from talking myself out of getting rid of them. I also added to that pile all of my “costume makeup.” This pile consisted of any product who’s sole purpose was Halloween, Comic Con, and Cougar/Seahawk Game Day. I knew that these products barely got used at home so they would never get used in Germany.
The products in my third category were hard to deal with. These products were not gross or old or expired but they are also hard/impossible to sanitize and give away. Mostly this pile consisted of lipstick, lip glosses, and cream products. The lip glosses, regardless of how expensive they were went in the garbage or “use up” pile. The expensive lipsticks in that pile went into my give away bag and I will leave it up to the discretion of my family if they want my “cooties” or not. The cheep ones went in the garbage. That was a fairly good sized pile and it really hurt but I just kept thinking about how heavy they are and how I never use them which made it a little easier.
Step 4: Depotting. I find a sort of sick satisfaction out of prying product out of bulky and unnecessary packaging. Judging by the number of YouTube videos out there on the subject, I’m not alone. My first project was my lipsticks. I had never deported these before so I was a bit nervous to light my first lipstick on fire. Aside from being time consuming, the whole thing was pretty easy. I only had one casualty when one of my pots melted in the microwave (a product of my OCD trying to neaten up the already finished product).

The picture above is my final product. All of these single tubes combined into this one pallet that I picked up in the beading section of Michael’s. While the two appear to take up roughly the same amount of space, the pallet still has room to expand without adding bulk.
The other accomplishment of this project was turning my handful of sample sized OCC Lip Tars into potted lipsticks. This was done by mixing it with chapstick when it was melted. The results were fantastic, but be warned that this process doesn’t work with the Metallic Lip Tars (they separate like crazy). I’ve since used the Lip Tars at least twice as much as before and I actually like the formula better now that it’s not so intense (I added a bit more chapstick than recommended to achieve this).
The other depotting project involve blushes, bronzers and highlighters. I already had a Z Pallet that I used for this purpose but it contained some products I didn’t LOVE and quite a few pans were basically empty. I bought a new pan of my favorite Too Faced Chocolate Solié bronzer to depot (which I highly do not recommend; those baby’s are REALLY stuck in their packaging). Pictured below is the final Z Pallet product. I also have a smaller pallet that has been finished for quite some time of singles and random eyeshadows I’ve saved from doomed pallets that I’ll add below since I think it’s pretty to look at.

Step 5: Now that my makeup was trimmed down as much as I could bear, I needed to find a makeup bag that would suit my needs. My makeup had previously been housed in a large metal train case that was fantastic, but would be absolutely impossible to take on my flight.
I needed a BIG bag (yes, even after editing my collection down considerably), something with room for lots of big pallets but still had some organization for all the loose items. After A LOT of searching, and several purchases and returns, I found this bag in Walmart. It has a large open center compartment for all my big pallets and some pouches along the interior wall that I’m using for foundation, primer, mascara and concealers. There are two small exterior compartments that I’m using for tweezers and other beauty tools. I got two small clear pouches to put eyeliners and lip glosses in which also fits in the middle with my pallets. The bag pretty much exactly fits my collection which means I’m not wasting space, so that’s good!

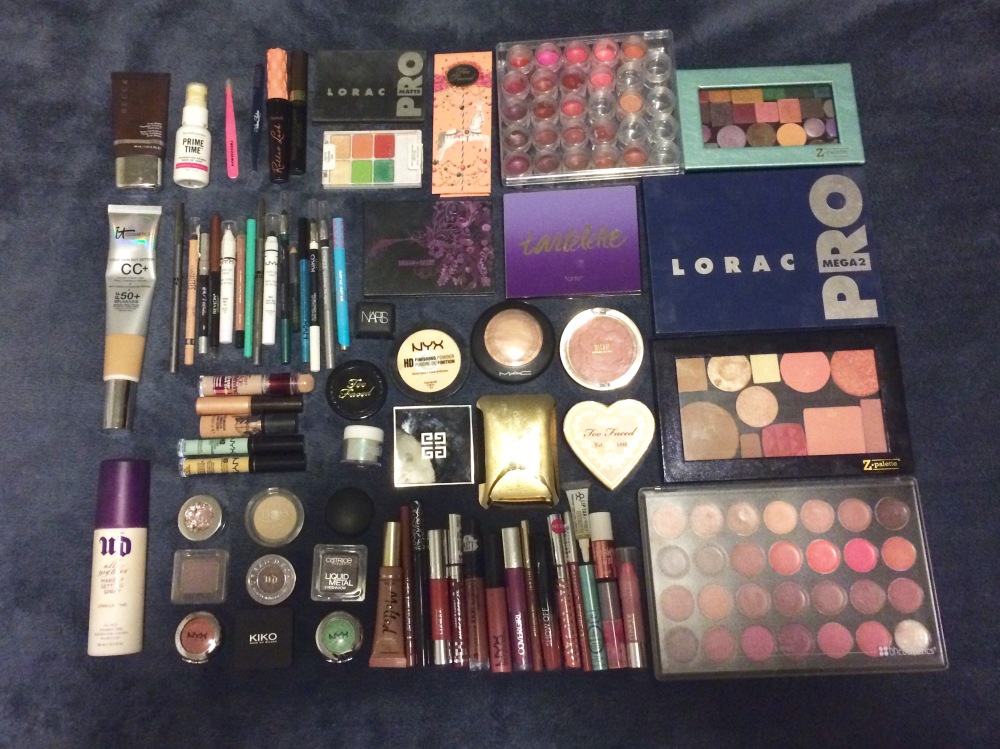
I’ll add a photo of the entirety of my makeup collection for those curious. My brushes won’t be fitting in this bag so I’ll leave them out of the photo. My last weigh in of this bag was 8 lbs but I think I have gotten this down even more since then. Also important to note is that some products such as my mascara and powder will be in my liquids bag so that I have them for the flight and that will further lighten this bag a bit more.
As always, feel free to comment any questions you might have. Let me know if you would like a depotting tutorial or further explanation of anything. I think I might also make a post about how I prepare my cosmetics for the flight so I can address any questions in that post as well!

Love your collection!
JennyLovesBeauty♥
LikeLike
Thank you! It’s definitely a work in progress but I’m really happy with it.
LikeLike